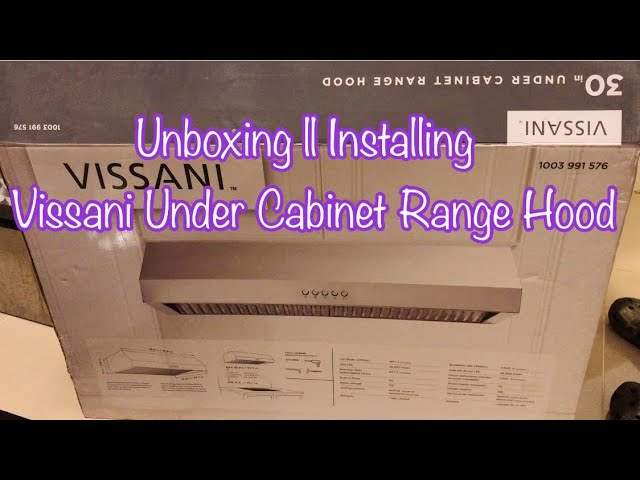
To install the Vissani 30-inch range hood, first, ensure you have the necessary tools and materials. Follow the manufacturer’s guidelines for mounting and electrical connections.
Installing a Vissani 30-inch range hood can elevate your kitchen’s functionality and aesthetics. This appliance efficiently removes smoke, odors, and grease, keeping your cooking space fresh and clean. Proper installation is crucial for optimal performance and safety. With the right tools and a clear understanding of the steps involved, you can complete the installation with ease.
This guide will walk you through the necessary steps, ensuring that your range hood operates effectively. Enjoy a cleaner, more comfortable cooking environment while enhancing the overall look of your kitchen with this stylish appliance.
Introduction To Vissani 30 Inch Range Hood
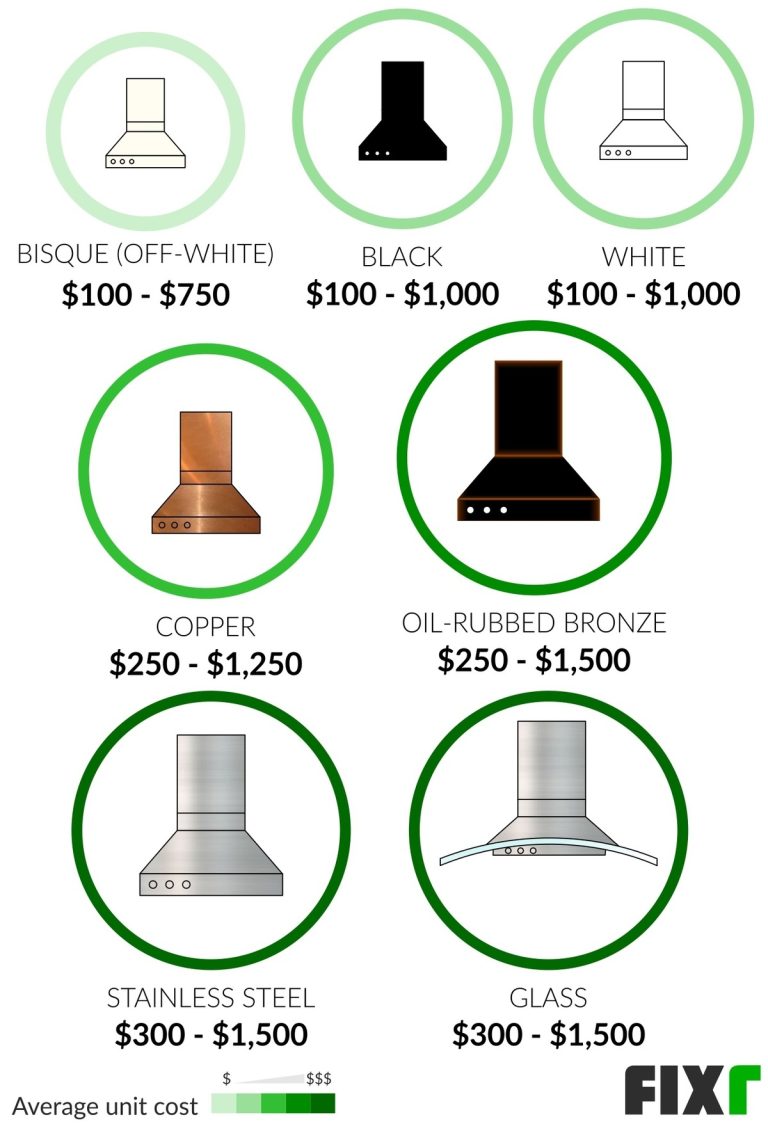
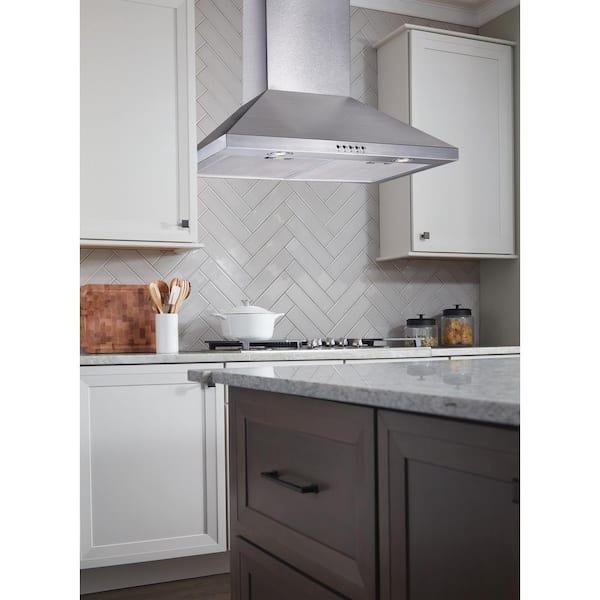
The Vissani 30 Inch Range Hood adds a stunning look to any kitchen. It blends style with practicality. This range hood comes in various colors. Choose one that matches your kitchen decor.
Its modern design enhances the overall aesthetic. Sleek lines and a shiny finish make it stand out. This hood does more than just look good. It effectively removes smoke and odors from cooking.
Installation is straightforward, making it easy for homeowners. The powerful fan ensures a clean air environment. Enjoy cooking without worrying about lingering smells.
Noise levels are low, making it pleasant to use. This unit combines beauty and functionality seamlessly. Make your kitchen a comfortable space with this stylish addition.

Credit: www.homedepot.ca
Pre-installation Considerations
Choosing the right model for your Vissani 30 Inch Range Hood is vital. Consider your kitchen size and style. Make sure the hood matches your cooking needs. Look for features like ventilation type and noise level. These factors will improve your cooking experience.
Gathering the tools and materials is also crucial for installation. Here’s a list to help:
| Tools | Materials |
|---|---|
| Drill | Mounting brackets |
| Screwdriver | Ducting materials |
| Level | Electrical wiring |
| Tape measure | Wall anchors |
Having these items ready makes the installation process smoother. Prepare for a successful setup!
Measuring And Preparation
Before starting the installation, check your space requirements. Measure the area above your stove. Ensure there is enough room for the Vissani 30 Inch Range Hood. The distance from the cooktop to the hood should be at least 24 inches.
Follow these safety measures during installation:
- Always turn off the power supply before starting.
- Use safety goggles to protect your eyes.
- Wear gloves to avoid cuts and scrapes.
- Have a second person assist with heavy lifting.
Credit: www.homedepot.com
Removal Of The Old Range Hood
Removing the old range hood is simple. Follow these easy steps:
- Turn off the power to the range hood.
- Remove the screws holding the hood in place.
- Carefully disconnect the ductwork.
- Take down the old range hood.
For disposal, consider these tips:
- Recycle metal parts whenever possible.
- Check local guidelines for electronic waste.
- Donate if the hood is still in good condition.
- Use a proper waste disposal service for hazardous materials.
Step-by-step Installation Guide
To mount the hood, find the right height for your kitchen. Use a level to ensure it is straight. Secure the hood using the provided screws. Make sure it is firmly in place.
For electrical connections, turn off the power at the circuit breaker. Connect the wires according to the color codes. Use wire nuts to secure the connections. Turn the power back on to check if the hood works.
For ductwork installation, measure the duct length needed. Cut the duct to size and connect it to the hood. Use duct tape to seal any gaps. Ensure there are no bends in the duct for better airflow.
Finishing Touches
Sealing and caulking are important for a clean finish. Use high-quality caulk to fill gaps. This helps prevent air leaks and improves efficiency.
Apply caulk around the edges of the range hood. Ensure it is smooth and even. This will give a professional look to your installation.
For cosmetic enhancements, consider adding a decorative trim. This can make your range hood stand out in your kitchen. Choose a style that matches your décor.
Lighting can also improve the appearance. Install LED lights for a modern touch. They are energy-efficient and brighten up the cooking area.
Testing Your New Range Hood
After installing your Vissani 30 Inch Range Hood, it’s time for testing. Start by plugging in the unit. Turn it on to check if the lights and fan work properly. Listen for any strange noises. A smooth operation means everything is set correctly.
Next, test the suction power. Place a piece of paper near the hood. The paper should stick if the hood works well. Also, check if the filters are clean and properly installed. Dirty filters can reduce performance significantly.
Don’t forget to verify the ventilation. Make sure air flows freely outside. Blocked vents can cause issues and reduce efficiency. Regular checks help maintain the hood’s performance over time.

Credit: www.homedepot.com
Maintenance And Care
Keeping your Vissani 30 Inch Range Hood clean is important for efficiency. Use a soft cloth and warm, soapy water. Avoid using harsh chemicals that may damage the surface.
Replace the filters every six months or more often if you cook frequently. Clean the grease filters with warm, soapy water. Dry them completely before reinstalling.
For common issues, check the power supply first. Ensure the hood is plugged in and the circuit breaker is not tripped. If the fan does not work, inspect the switch and wiring.
Unusual noises may indicate loose parts. Tighten any screws or brackets as needed. Regular maintenance helps your range hood last longer.
Frequently Asked Questions
How Do I Install A Vissani Range Hood?
To install a Vissani range hood, start by turning off the power supply. Follow the installation manual step-by-step. Secure the mounting bracket to the wall, ensuring it’s level. Connect the ductwork and electrical wiring according to local codes. Finally, attach the range hood and test its functionality.
What Tools Do I Need For Installation?
For installing a Vissani range hood, you will need a drill, screwdriver, level, measuring tape, and wire connectors. Additionally, having a stud finder can be beneficial. Ensure you have safety goggles and gloves for protection. Proper tools will make the installation process smoother and more efficient.
Can I Install It Myself?
Yes, you can install a Vissani range hood yourself if you’re comfortable with basic electrical and carpentry tasks. However, it’s essential to follow the installation instructions carefully. If you’re unsure about any step, consider hiring a professional. Proper installation ensures safety and optimal performance of the range hood.
What Is The Typical Installation Height?
The typical installation height for a Vissani range hood is between 24 to 30 inches above the cooking surface. This height maximizes efficiency and ensures effective ventilation. However, it may vary based on your cooking appliances. Always refer to the manufacturer’s guidelines for specific recommendations.
Conclusion
Installing a Vissani 30 Inch Range Hood enhances your kitchen’s functionality and style. With proper planning and the right tools, the process can be straightforward. Enjoy cleaner air and improved cooking experiences. Take pride in your installation, and relish the benefits this range hood brings to your home.
Happy cooking!