To install a downdraft range hood, first ensure proper ventilation and electrical connections. Secure the unit to the countertop and connect the ductwork.
Downdraft range hoods offer a sleek alternative to traditional overhead models, efficiently venting smoke and odors from your kitchen. Their unique design makes them ideal for island cooktops, where space is limited. Installing one requires careful planning and attention to detail, especially regarding ductwork and electrical requirements.
Proper installation enhances kitchen aesthetics and functionality, ensuring a cleaner cooking environment. Familiarizing yourself with the installation steps will streamline the process, making it easier to achieve professional results. With the right tools and guidance, you can enjoy the benefits of a downdraft range hood in your home.
Credit: www.youtube.com
Introduction To Downdraft Range Hoods
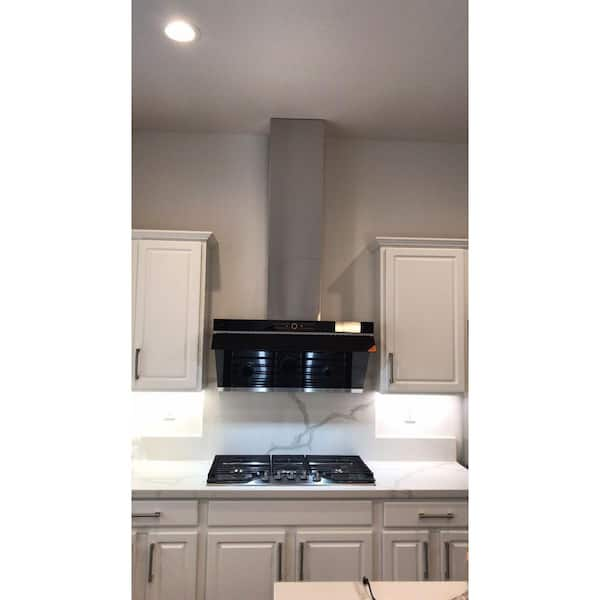
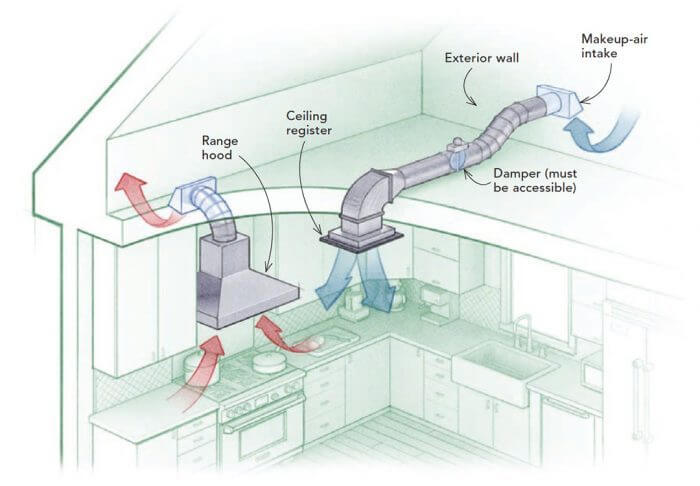
Downdraft range hoods are a great choice for modern kitchens. They pull smoke and odors down, keeping your kitchen fresh. These hoods save space and create a clean look.
Many homeowners love downdraft hoods for their style. They blend into countertops or cooktops. This design enhances the overall kitchen aesthetics. It allows for an open and airy feel.
Another benefit is their efficiency. They work well in both small and large kitchens. Downdraft hoods can match various designs, from traditional to contemporary. Choose a downdraft hood to elevate your kitchen!

Credit: www.greenbuildingadvisor.com
Pre-installation Considerations
Assessing your kitchen layout is vital for a successful installation. Ensure enough space for the downdraft range hood. Check if it fits well with your cooking range. Measure the height and width of the area.
Choosing the right model depends on your cooking habits. Consider the size and style that matches your kitchen. Look for features like noise levels and filter types.
Understanding ventilation requirements is crucial for efficiency. Know your kitchen’s airflow needs based on size. Verify the local building codes for proper installation. Good ventilation keeps the air fresh and clean.
Tools And Materials Needed
To install a downdraft range hood, certain tools are essential. These tools make the job easier and safer.
- Drill – For making holes and securing fixtures.
- Screwdriver – Useful for screws and fittings.
- Measuring tape – Ensures accurate measurements.
- Level – Keeps the hood straight.
- Stud finder – Helps locate wall studs.
Quality materials ensure a successful installation. Choose the best options for durability and performance.
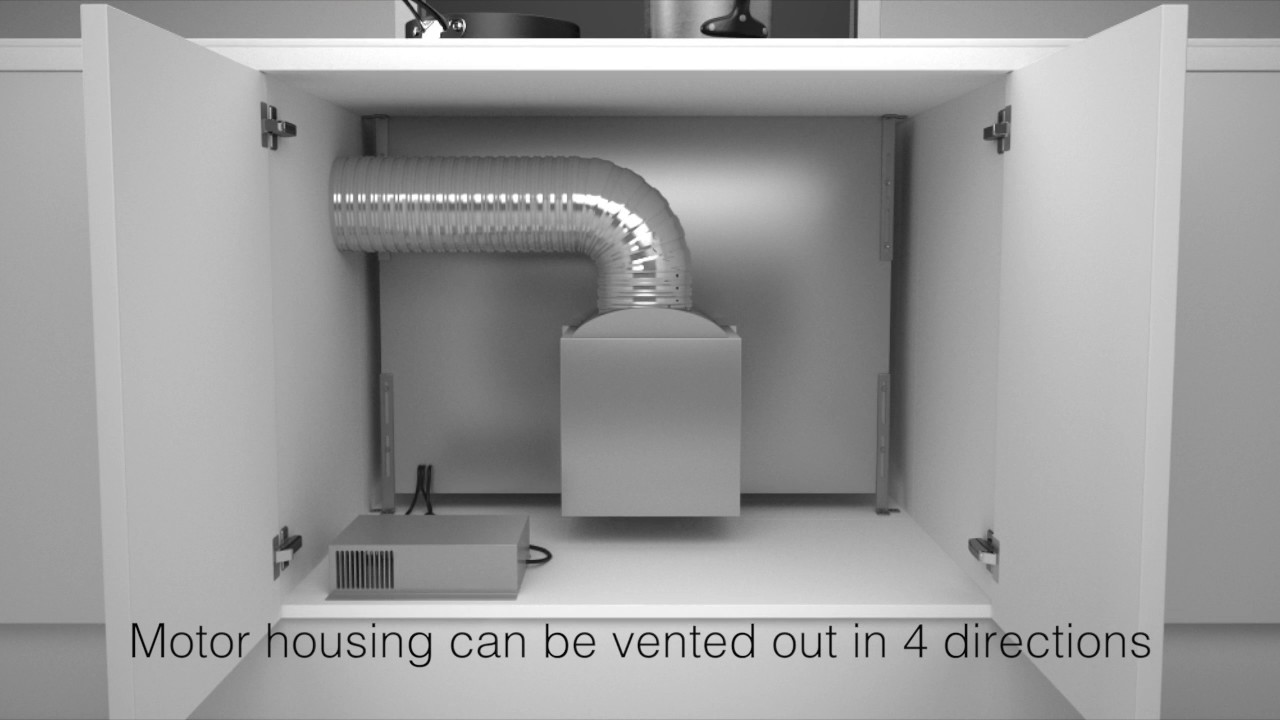
- Vent duct – Make sure it is the right size.
- Electrical wiring – Needs to meet local codes.
- Mounting brackets – Should be sturdy and reliable.
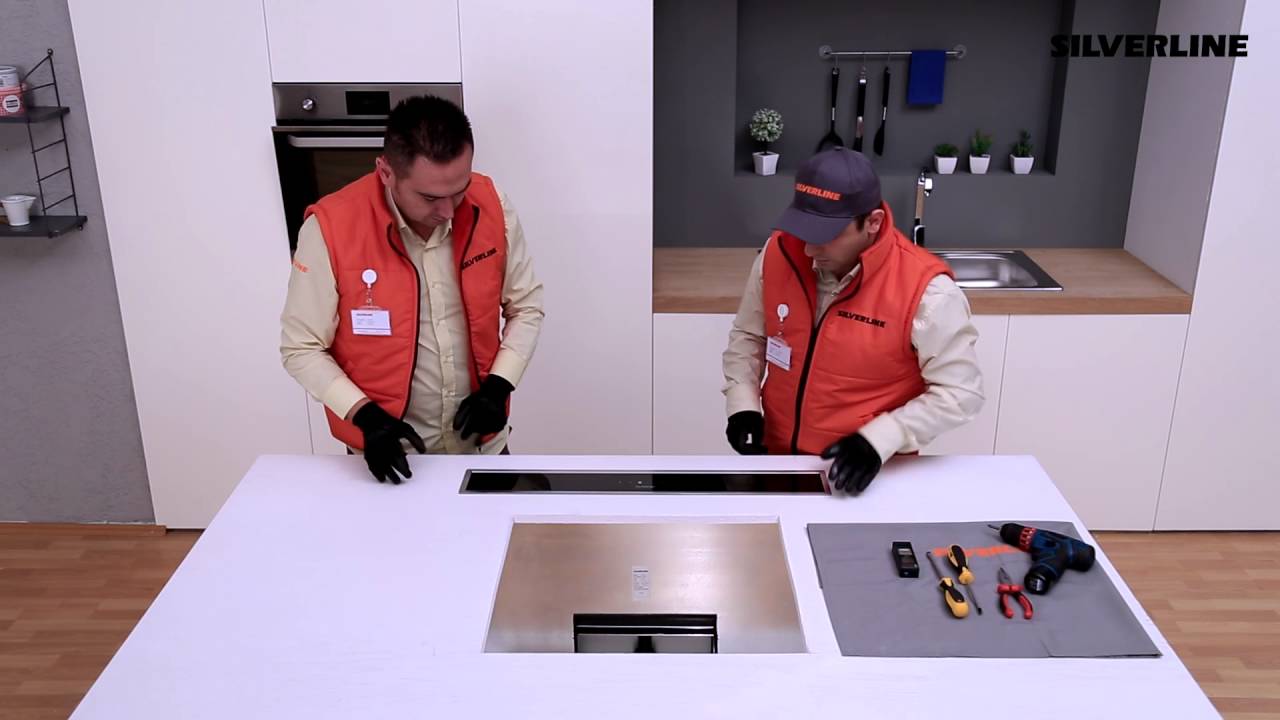
Step-by-step Installation Guide
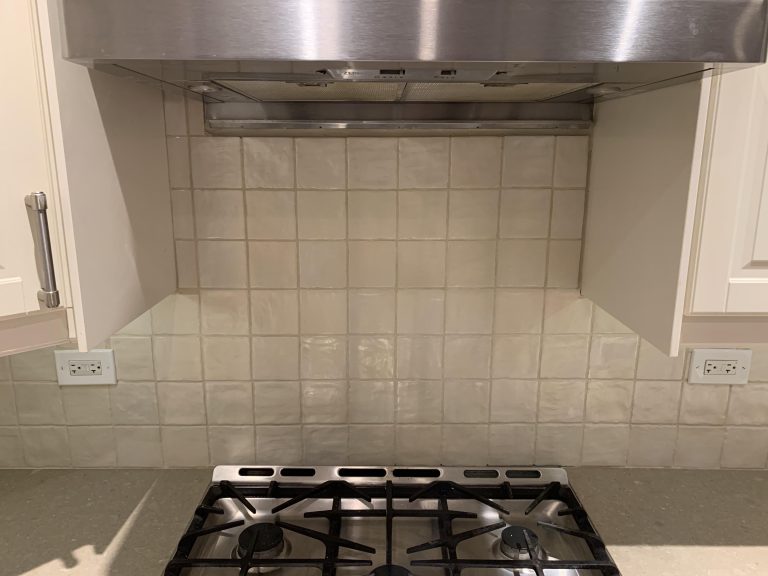
Start by measuring the space for your downdraft range hood. Make sure to leave enough room for clearance and ventilation. Check the manufacturer’s guidelines for specific dimensions.
For cutting and modifying countertops, use a jigsaw or router. Carefully follow the marked lines for a clean cut. Ensure the edges are smooth to avoid any injuries.
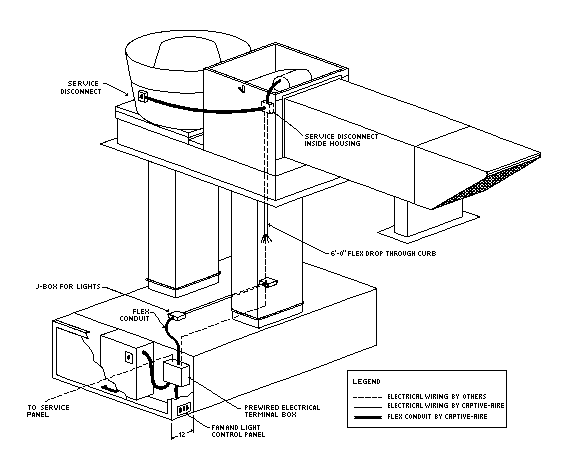
For the electrical and venting setup, turn off the power before starting. Connect the range hood to the electrical supply as per the instructions. Make sure to use the correct duct size for proper airflow.
Always follow local building codes for safety. Proper installation ensures the hood works efficiently and safely.
Safety Tips During Installation
Electrical safety measures are essential for a successful downdraft range hood installation. Always turn off the power at the circuit breaker before starting. Use insulated tools to prevent electric shocks. Ensure all wiring is up to code and properly connected.
Proper handling of tools and equipment is also vital. Keep tools in good condition to avoid accidents. Wear safety goggles and gloves for protection. Store tools in a safe place to prevent injuries.
Follow these tips to ensure a safe and effective installation process. Safety first leads to a successful project.
Testing Your New Downdraft Range Hood
Begin the initial startup procedure by ensuring the power supply is connected. Switch on the circuit breaker to provide electricity. Press the power button on the range hood to turn it on.
Next, adjust the fan speed to test its functionality. Listen for any unusual noises or vibrations. A smooth operation indicates a successful installation.
After testing the fan, check the lighting. Ensure all bulbs illuminate correctly. If any bulbs are out, replace them immediately.
| Performance Check | Status |
|---|---|
| Fan Operation | ✔️ Good |
| Noise Level | ✔️ Normal |
| Lighting | ✔️ All functional |
Maintenance For Longevity
Regular cleaning helps keep your downdraft range hood working well. Wipe the exterior with a soft cloth. Use warm, soapy water for tough stains. Check and clean the filters monthly. Soaking filters in warm water can remove grease. Rinse and dry them completely before reinstalling.
For common issues, first, check the power supply. Ensure the hood is plugged in and the circuit is working. If the fan is noisy, clean the fan blades. Dust buildup can cause loud sounds. If the light doesn’t work, replace the bulb. Always ensure the hood is off before any maintenance.
Enhancing Your Kitchen’s Functionality
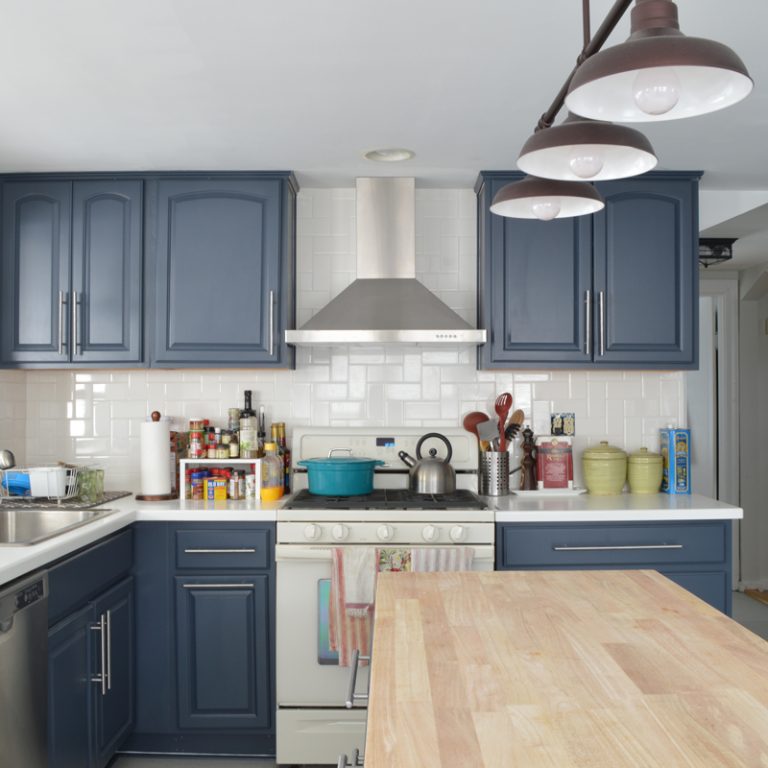
Installing a downdraft range hood can greatly improve your kitchen’s usability. This appliance works well with various kitchen tools. Pair it with a cooktop for effective smoke and odor removal. Ensure the design matches your kitchen theme for a cohesive look.
Final touches enhance your kitchen’s charm. Use matching colors for the range hood and cabinets. Adding decorative elements like plants or art can create warmth. Choose lighting that highlights both the hood and the kitchen.
| Appliance | Benefits |
|---|---|
| Cooktop | Compliments downdraft efficiency. |
| Ovens | Enhances cooking experience. |
| Refrigerators | Balances kitchen functionality. |
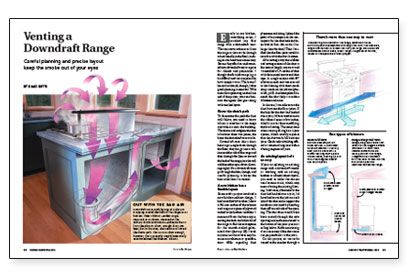
Credit: www.finehomebuilding.com
Frequently Asked Questions
How Do I Install A Downdraft Range Hood?
To install a downdraft range hood, start by selecting an appropriate location. Ensure the unit aligns with your cooktop. Next, connect ductwork and secure the hood to the cabinetry. Follow the manufacturer’s instructions for wiring and mounting. Always check for proper ventilation after installation.
What Tools Do I Need For Installation?
For installing a downdraft range hood, you’ll need a drill, screwdrivers, and a measuring tape. Additionally, have duct tape and a level handy for accurate installation. A stud finder can help locate wall studs. Always prioritize safety by using protective gear during the installation process.
Do I Need Professional Help For Installation?
While experienced DIYers can install a downdraft range hood, professional help is recommended. Hiring a professional ensures correct installation and adherence to local codes. They can also provide expertise in ventilation and electrical work. This minimizes the risk of future issues and enhances performance.
What Are The Benefits Of A Downdraft Range Hood?
Downdraft range hoods offer excellent ventilation without occupying overhead space. They effectively capture smoke and odors directly from the cooktop. Their sleek design complements modern kitchens. Additionally, they can enhance kitchen aesthetics while improving air quality, making cooking more enjoyable and safe.
Conclusion
Installing a downdraft range hood can elevate your kitchen’s functionality and aesthetics. It effectively captures smoke and odors, keeping your space fresh. Following proper installation steps ensures optimal performance. With the right tools and guidance, this project can be a rewarding DIY experience.
Enjoy cooking in a cleaner, more comfortable environment!