To convert an under-cabinet range hood to a wall-mount, first, remove the existing unit. Then, install the wall-mount hood using appropriate brackets and hardware.
Converting an under-cabinet range hood to a wall-mount model can enhance kitchen aesthetics and functionality. This process involves removing the old unit and securing the new one to the wall using brackets and screws. Ensure you have the right tools and measurements before starting.
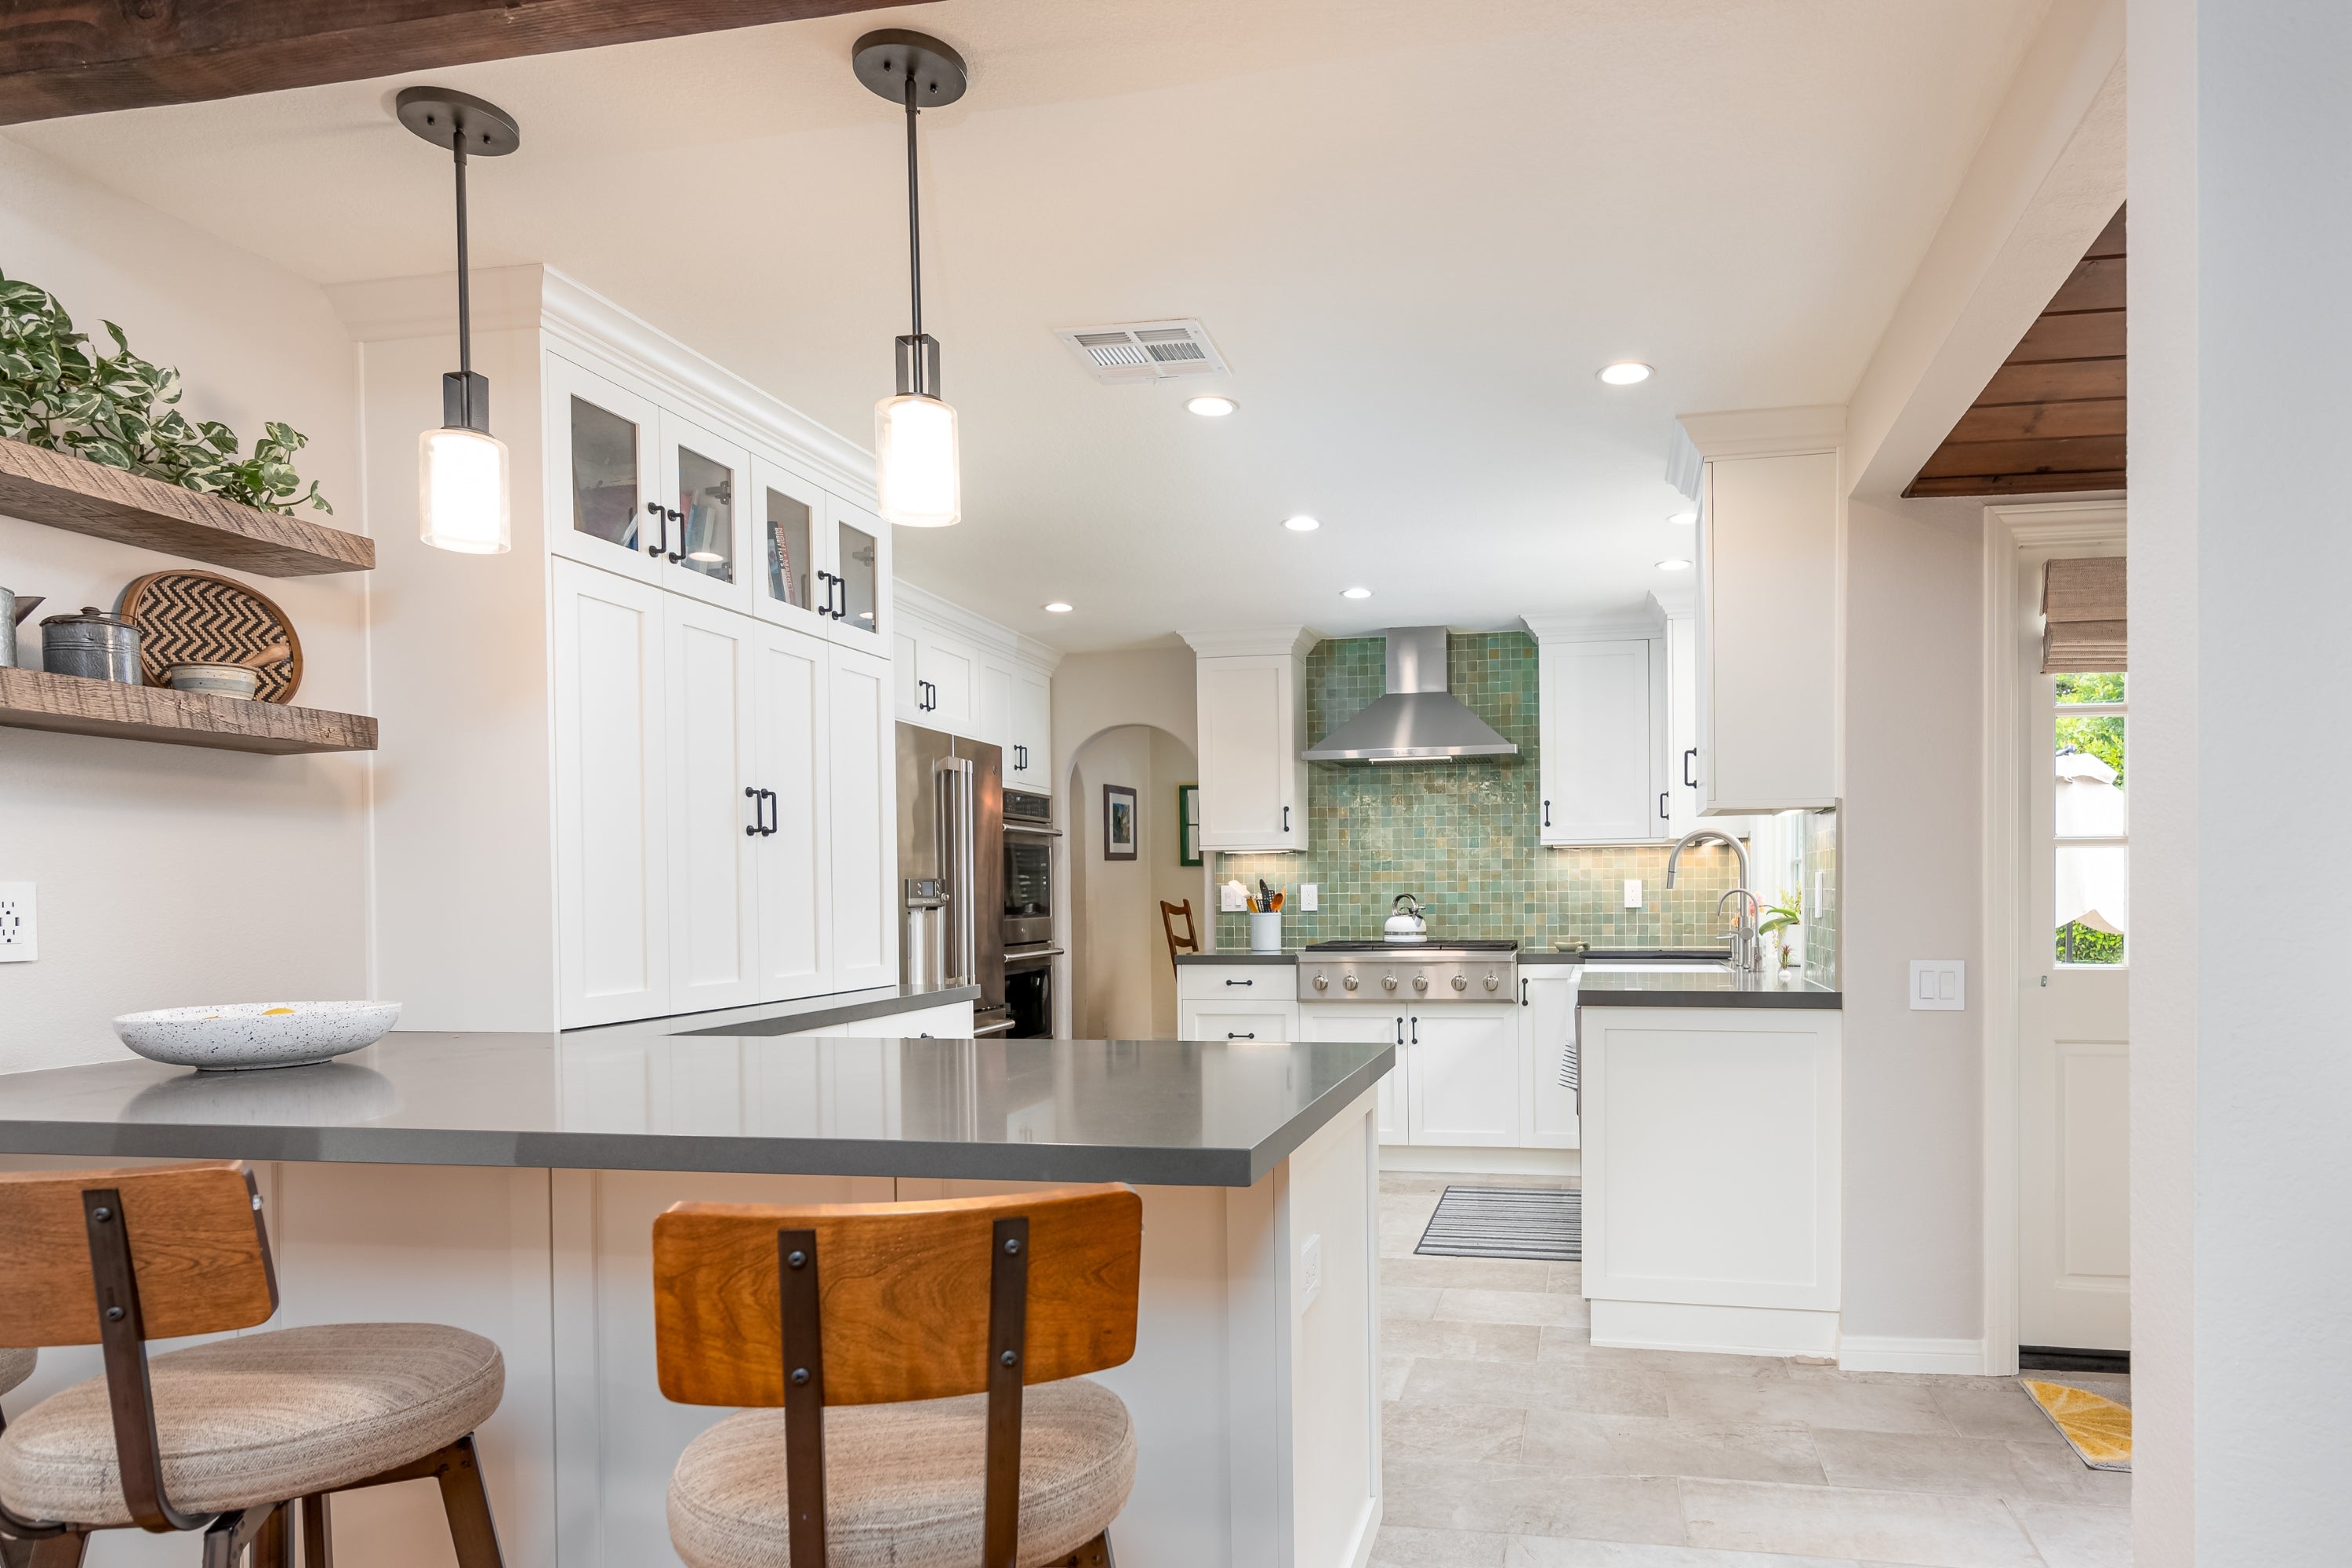
Proper ventilation is crucial for a successful installation. Wall-mount range hoods offer better coverage and improved air circulation compared to under-cabinet models. This upgrade can also free up cabinet space, making your kitchen more organized. Investing time in this project can significantly improve your cooking environment.
Tools And Materials
A screwdriver is necessary to remove screws. A drill helps make holes in the wall. Use a tape measure to get accurate measurements. A level ensures everything is straight. A pencil marks spots on the wall. Safety glasses protect your eyes while working. A step ladder helps you reach high areas.
You will need a wall mount kit for the range hood. Get mounting brackets to attach the hood to the wall. Screws and anchors will hold everything in place. Duct tape seals any gaps in the ductwork. A power outlet near the hood is essential. Cable ties organize and secure wires. Sealant prevents air leaks.
Credit: www.diychatroom.com
Preparation Steps
Always turn off the power supply before starting. Wear protective gloves and goggles to stay safe. Keep a fire extinguisher nearby in case of emergencies. Make sure the area is well-ventilated. Keep a first-aid kit handy. Follow the manufacturer’s instructions for safety.
Use a measuring tape to find the right spot. Mark the spots with a pencil. Make sure the marks are level and even. Double-check your measurements before drilling. Use a level tool to ensure accuracy. This helps in mounting the hood properly.
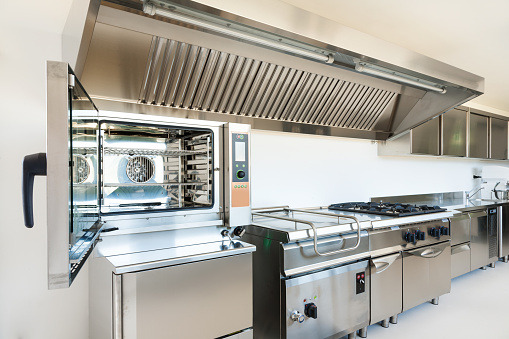
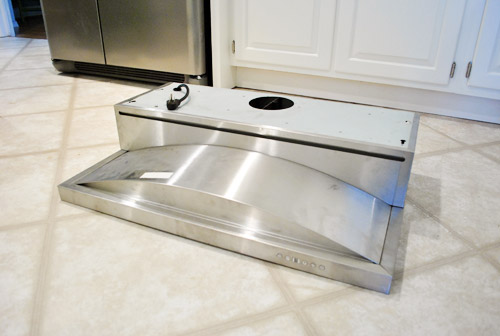
Removing The Cabinet Hood
Start by turning off the power to the range hood. Use a circuit breaker or unplug the unit. Safety is very important here. Double-check that power is off by testing the unit. Use a voltage tester for extra safety.
First, remove the screws holding the hood in place. Support the hood with one hand while unscrewing. Carefully lower the hood once all screws are out. Disconnect any remaining wires or ducts. Now, the hood is free and can be removed.

Credit: www.amazon.com
Wall Mount Installation
Mark the wall where the mounting bracket will go. Use a level to ensure it is straight. Drill pilot holes into the marks. Attach the bracket using screws and anchors. Make sure it is secure.
Lift the range hood onto the bracket. Make sure it fits snugly. Secure the hood with the provided screws. Tighten them to ensure the hood is stable. Connect the wiring as per the manual. Test the hood to ensure it works properly.
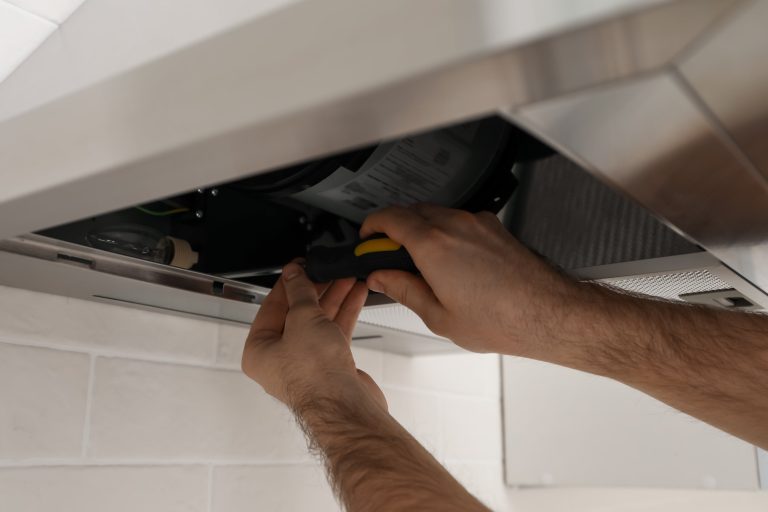
Wiring And Ventilation
Turn off the power at the circuit breaker. This is very important for your safety. Next, remove the old range hood. Make sure to disconnect all wires carefully. Use a voltage tester to ensure there is no electricity. Connect the new range hood wires to the existing wires. Match the color codes: black to black, white to white, and green to ground. Secure all connections with wire nuts. Wrap them with electrical tape for extra safety.
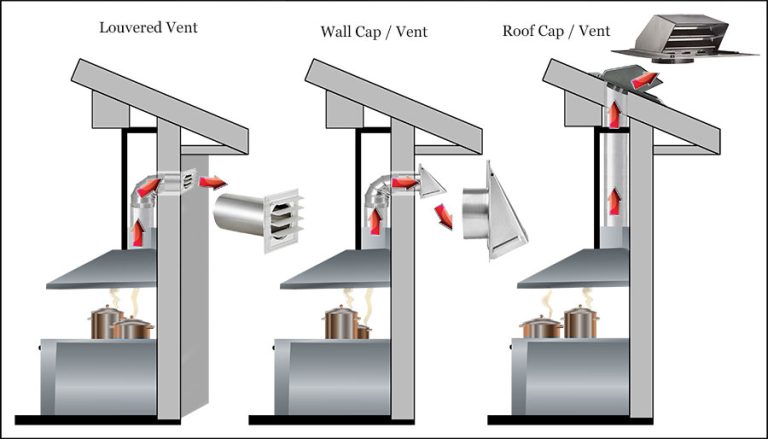
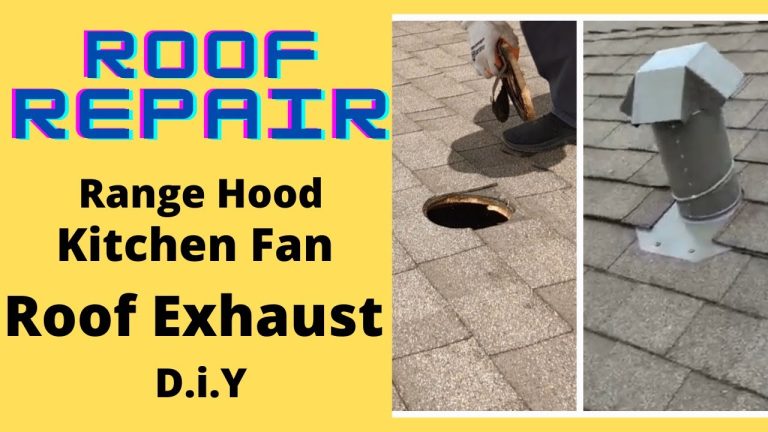
Measure the vent opening on the wall. It should match the size of your new range hood vent. Cut a hole if needed. Attach the vent duct to the range hood. Ensure it is secure and tight. Seal any gaps with foil tape. This prevents air leaks. Run the duct through the wall opening. Attach it to the exterior vent cap. Make sure the cap is weatherproof. This will keep rain and pests out.
Credit: hauslane.com
Finishing Touches
Transform your kitchen by converting an under-cabinet range hood to a stylish wall mount. Enhance functionality and modernize your space effortlessly. Enjoy a cleaner, more efficient cooking environment with this simple upgrade.
Sealing Gaps
Apply sealant around the edges of the range hood. This will prevent air leaks. Use a caulking gun for even application. Smooth out the sealant with a damp cloth. Make sure all gaps are tightly sealed. This step ensures maximum efficiency. Allow the sealant to dry completely before using the hood.
Final Inspections
Check if the range hood is securely mounted. Ensure all screws and brackets are tight. Turn on the hood to test ventilation. Make sure there is no noise or vibration. Verify that the lights and fan work properly. Inspect the ductwork for any leaks. Confirm that the wall mount is stable.
Common Issues
Some range hoods may not fit. Measure the space before buying. Check if the hood has enough power. A weak motor won’t clear smoke. Ensure proper venting. Poor venting traps smoke inside. Fix wiring issues by checking connections. Loose wires can cause problems. Replace filters regularly. Dirty filters reduce efficiency.
Clean the range hood monthly. Use a damp cloth for grease. Avoid harsh chemicals. Change filters every 3 months. Grease buildup can cause fires. Inspect the vent for blockages. Clear any debris. Tighten loose screws. Loose parts can make noise. Check the fan regularly. A broken fan reduces performance.
Frequently Asked Questions
How To Convert An Under Cabinet Range Hood?
To convert, remove the under cabinet range hood and mount it on the wall. Ensure proper ventilation and secure fittings. Follow manufacturer instructions for best results.
Is It Easy To Convert Range Hood To Wall Mount?
Yes, it’s relatively simple with basic tools. However, ensure you follow the manufacturer’s guidelines and safety precautions for proper installation.
What Tools Are Needed For Conversion?
You typically need a drill, screwdriver, level, and measuring tape. Follow the range hood’s installation guide for any additional tools required.
Can All Under Cabinet Range Hoods Be Wall Mounted?
Not all models are suitable for wall mounting. Check the manufacturer’s specifications to ensure compatibility before attempting conversion.
Conclusion
Converting an under cabinet range hood to a wall mount can enhance your kitchen’s functionality and style. This upgrade is both practical and visually appealing. Follow our guide for a smooth transformation. Enjoy a more efficient and modern cooking space.
Your kitchen deserves this fresh new look!