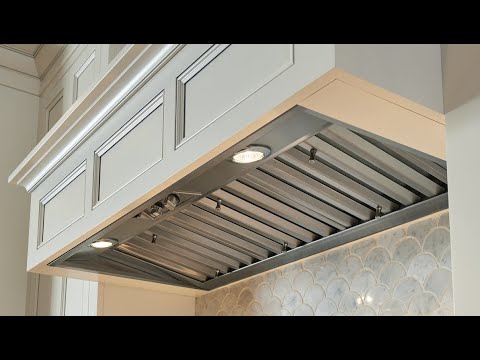
Thermador range hood installation ensures effective kitchen ventilation. Follow the manufacturer’s instructions for a successful setup.
Installing a Thermador range hood enhances your kitchen by efficiently removing smoke, odors, and grease. This appliance is crucial for maintaining a clean and healthy cooking environment. Proper installation not only ensures optimal performance but also extends the lifespan of your range hood.
Key steps include selecting the appropriate model, measuring the installation space accurately, and securely mounting the unit. Professional installation is often recommended to guarantee safety and functionality. By investing time in the correct setup, you can enjoy a more pleasant cooking experience and maintain the air quality in your kitchen.
Credit: www.thermador.com
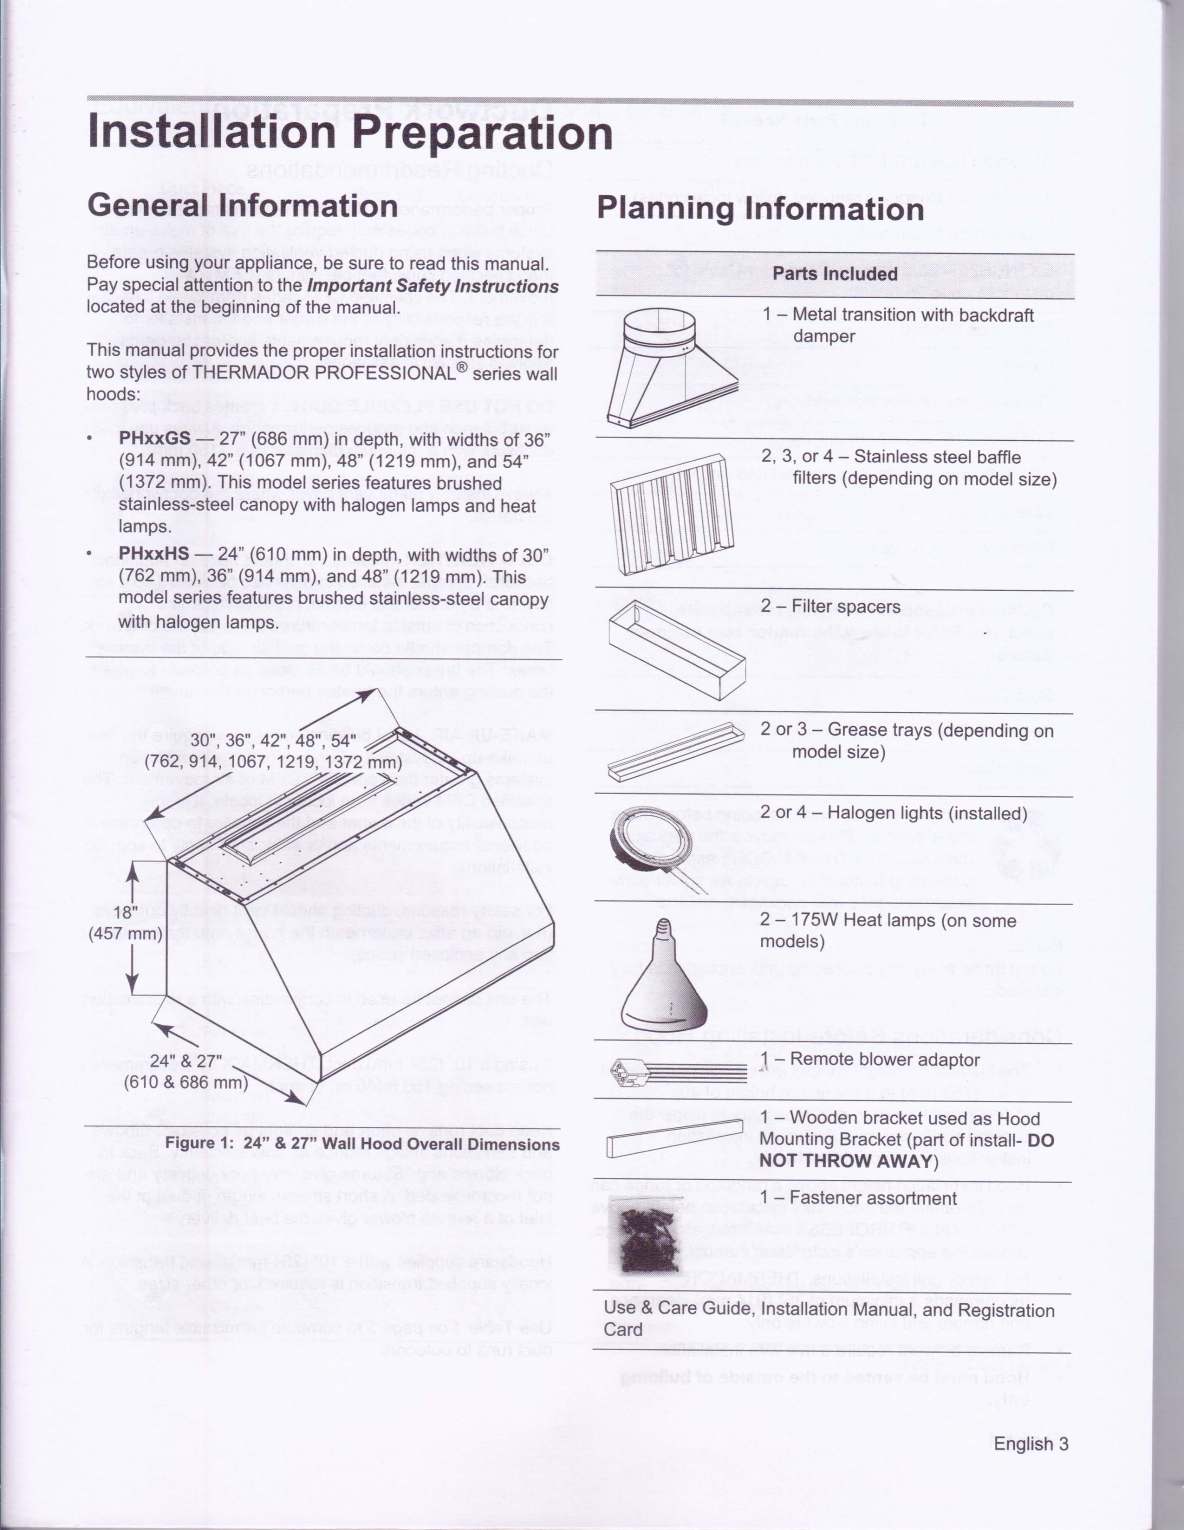
Tools And Materials
Thermador range hood installation requires essential tools and materials. Gather a screwdriver, drill, measuring tape, and mounting brackets. Ensure you have the correct ductwork and venting materials for a seamless setup.
Essential Tools
A successful installation needs specific tools. A screwdriver set is crucial for securing screws. A drill makes holes for mounting brackets. A measuring tape ensures accurate placement. Pliers help with gripping and bending wires. Level ensures the hood is installed straight. Stud finder locates wall studs for secure mounting. Wire stripper prepares electrical wires.
Necessary Materials
The right materials guarantee a smooth process. Mounting brackets hold the hood in place. Screws and anchors secure the unit to the wall. Electrical tape insulates wires safely. Duct tape helps with sealing air ducts. Flexible duct channels the air outside. Wire nuts connect electrical wires securely. Power cord provides the necessary electrical connection.
Pre-installation Preparation
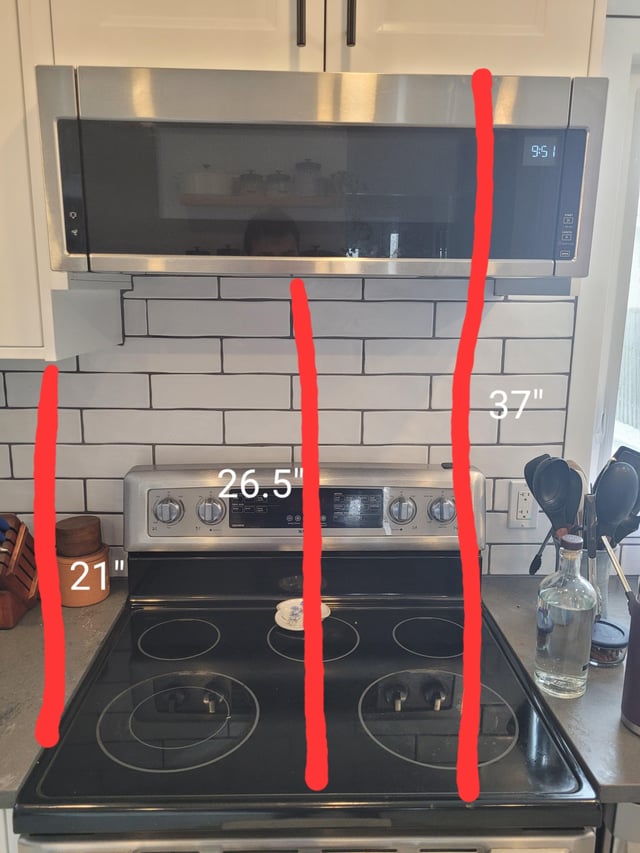
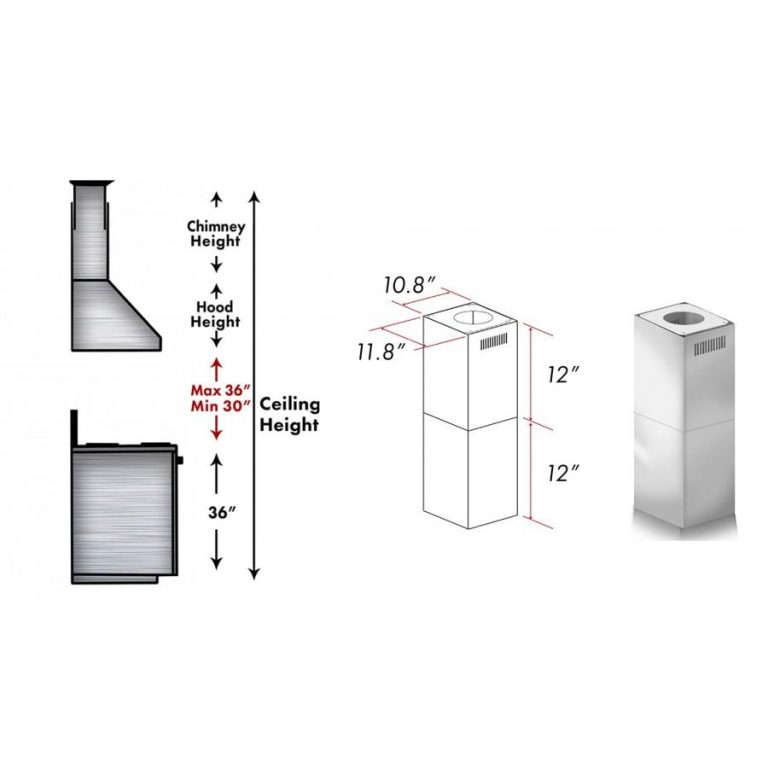
First, measure the width of the cooking area. This ensures the range hood fits properly. Use a tape measure for accuracy. Write down the measurements. Make sure to account for cabinet space. The range hood should cover the entire cooking surface. This helps to capture all the smoke and fumes. Double-check your measurements to avoid mistakes. An improper fit can lead to issues later.
Always turn off the power before starting. This prevents electrical shocks. Use a voltage tester to confirm the power is off. Wear gloves to protect your hands. Safety goggles keep your eyes safe from dust. Ensure the work area is well-lit. Poor lighting can cause accidents. Keep a first aid kit nearby. Be cautious when using tools. Follow the manufacturer’s safety guidelines.
Removing The Old Range Hood
Begin by disconnecting the power supply and removing screws or brackets securing the old range hood. Carefully detach and set aside for disposal.
Turning Off Power
Always ensure your safety first. Locate the circuit breaker for the kitchen. Flip the switch to turn off the power. Use a voltage tester to confirm the power is off. Never skip this step.
Detaching The Old Unit
Find the screws holding the old range hood. Use a screwdriver to remove these screws. Have someone help you support the unit. Slowly lower the old range hood. Disconnect the wires attached to the hood. Secure the wires with electrical tape.
Mounting The New Range Hood
Ensure the range hood is level. Use a pencil to mark the spots. These marks show where to drill.
Drill holes at the marked spots. Use the proper drill bit for your wall type. Make sure the holes are clean and debris-free.
Electrical Connections
Ensure the power is off before starting. Use a voltage tester to check. Connect the black wire from the range hood to the black wire from your home. Twist the wires together with a wire nut. Repeat with the white wires. Finally, connect the green or bare wire to the green screw on the unit.
After wiring, place all wires inside the junction box. Use wire nuts to secure all connections. Tighten the screws on the junction box cover. Make sure no wires are loose. Check all connections one more time. Turn the power back on to test the unit.
Credit: www.thermador.com
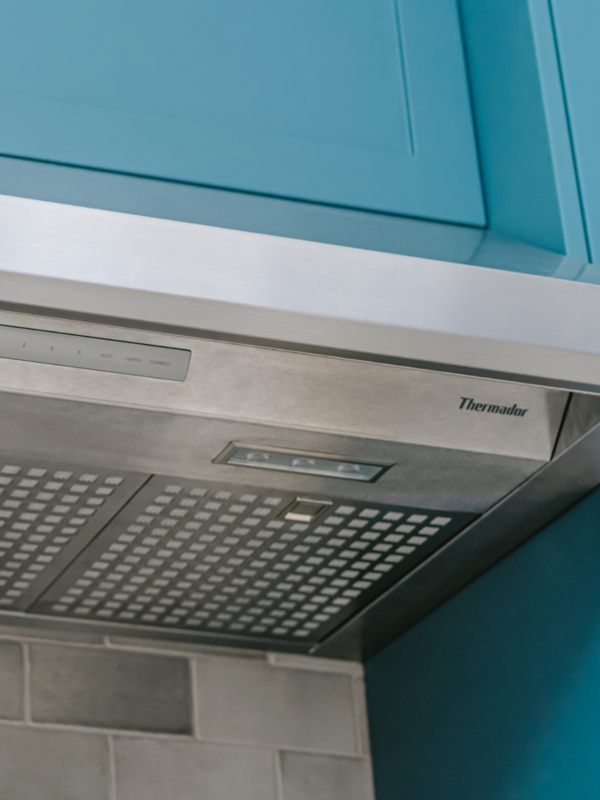
Final Adjustments
Ensure the range hood is perfectly level. Use a spirit level to check this. Adjust the screws to make it level. Tighten the screws securely. This will keep the hood steady. A level hood works best.
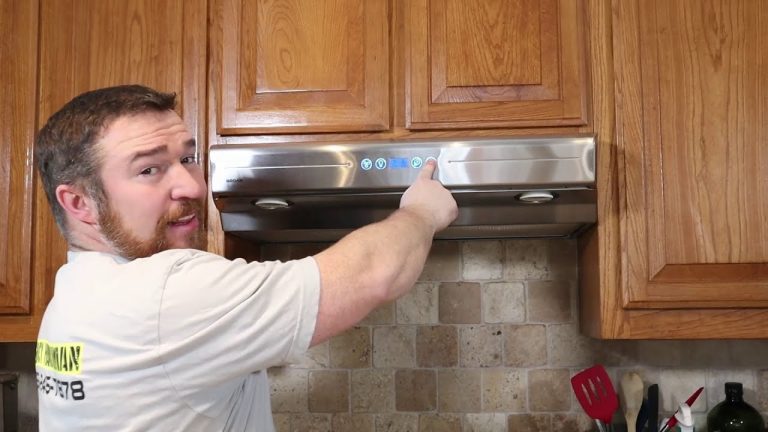
Turn on the range hood. Check if the lights work. Listen for the fan noise. It should be smooth and not too loud. Try all the speed settings. Each setting should work properly. Make sure the hood is pulling air well. This ensures it is installed correctly.
Maintenance Tips
Always clean the filters to keep your range hood working well. Remove them and wash with warm, soapy water. Use a soft brush to scrub away grease and dirt. Rinse thoroughly and let them air dry. Do this every month to ensure the best performance. If the filters are dishwasher-safe, place them in the dishwasher for a deep clean. Make sure they are completely dry before re-installing.
Check for blockages in the ducts every few months. Look for any loose screws or parts. Tighten them to prevent noise and damage. Inspect the fan and motor for dust and debris. Clean them to maintain efficiency. Ensure the lights are working and replace any burnt-out bulbs. Regular inspections keep your range hood in top shape.

Credit: progress-builders.com
Frequently Asked Questions
How Do I Install A Thermador Range Hood?
Begin by turning off the power. Mount the bracket securely. Connect the ductwork and electrical wiring. Attach the hood. Securely fasten all screws. Turn the power back on and test the unit.
What Tools Do I Need For Installation?
You’ll need a drill, screwdriver, measuring tape, level, and wire stripper. Ensure you have all necessary tools before starting. These tools will help you complete the installation efficiently and correctly.
Can I Install The Range Hood Myself?
Yes, you can install it yourself if you follow the instructions. Ensure you understand electrical wiring and ductwork. If unsure, consider hiring a professional for safety and accuracy.
How Long Does Installation Take?
Installation usually takes about 2-4 hours. Time depends on your experience and kitchen setup. Ensure you allocate enough time for a thorough and safe installation.
Conclusion
Installing a Thermador range hood can greatly enhance your kitchen experience. This guide simplifies the process for you. Follow the steps carefully to ensure optimal performance. Enjoy a cleaner and more efficient cooking space. Proper installation guarantees longevity and safety.
Upgrade your kitchen with a Thermador range hood today.