To install a range hood backdraft damper, first disconnect the range hood from the power source. Then, attach the damper to the ductwork, ensuring a snug fit.
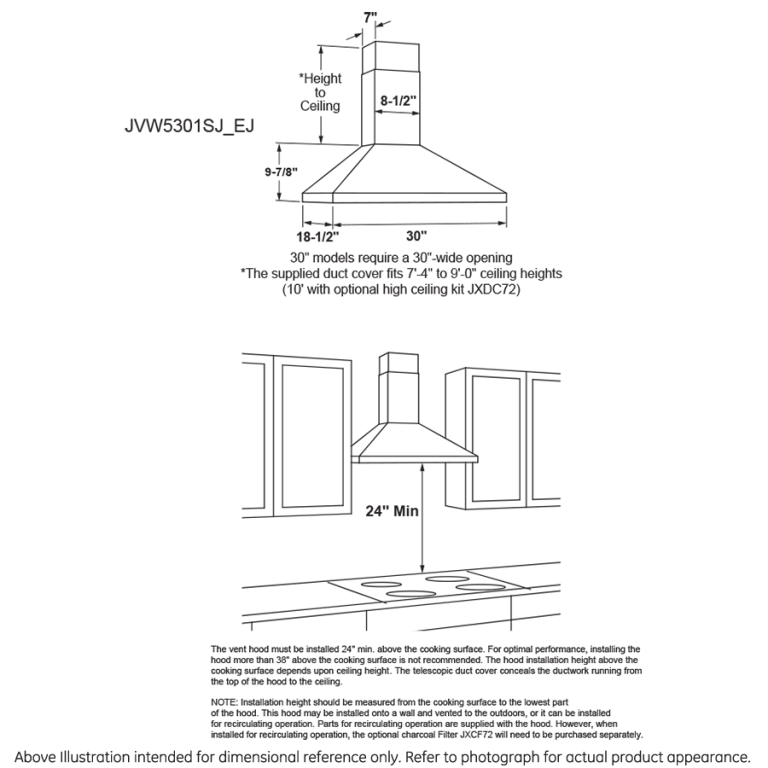
Range hood backdraft dampers play a crucial role in maintaining indoor air quality. They prevent unwanted air from entering your home while allowing cooking odors and moisture to escape. Installing a backdraft damper is a straightforward process that enhances the efficiency of your range hood.
Proper installation can also reduce energy costs by preventing cold air from seeping in. Understanding the steps involved ensures a seamless setup. This guide will help you navigate the installation process, making your kitchen a more comfortable and pleasant place to cook. Enjoy cleaner air and a more efficient kitchen with a properly installed damper.
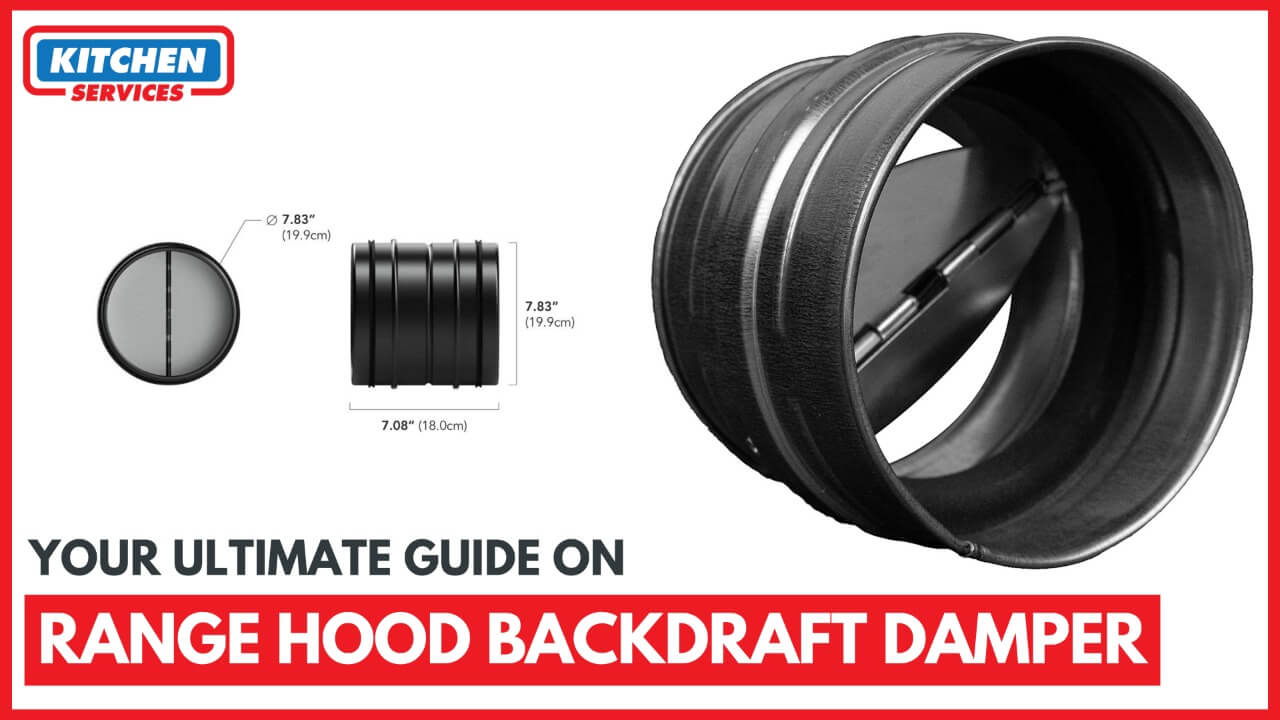
Credit: kitchen.services
Introduction To Range Hood Backdraft Dampers
Range hood backdraft dampers are essential for proper ventilation in your kitchen. They prevent unwanted air from entering your home. This helps keep your kitchen fresh and free from odors.
Proper ventilation is crucial for maintaining healthy air quality. It reduces the risk of mold and moisture build-up. A backdraft damper works by allowing air to flow out while blocking it from coming back in.
Installing a backdraft damper can help improve energy efficiency. It ensures that heated or cooled air does not escape through the ventilation system. This saves on energy costs over time.
Tools And Materials Required
To install a range hood backdraft damper, gather the right tools. You will need:
- Measuring tape
- Drill
- Screwdriver
- Level
- Hacksaw
- Safety goggles
- Masking tape
Choosing the right damper model is crucial. Look for a damper that fits your duct size. Check the material; metal dampers are more durable. Ensure it opens and closes easily. Proper installation prevents backdrafts and improves airflow.
Preparation Steps Before Installation
Before starting, ensure your workspace is clean and safe. Always wear safety goggles and gloves to protect yourself. Turn off all power sources to avoid accidents. Keep your tools organized for easy access.
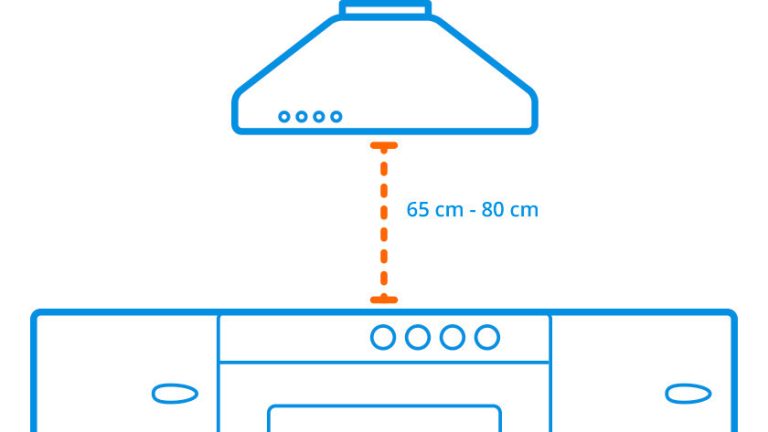
Measuring the vent area is crucial. Use a tape measure to find the size of the opening. Clear any obstructions around the vent. Ensure there is enough space for the damper to fit properly. Check that the ductwork is in good condition.
Access the vent area safely. Use a ladder if necessary. Ensure it is stable and secure. Avoid working alone if possible. Having someone nearby can help in case of emergencies.
Removing The Existing Vent Cover
Start by turning off the power supply to the range hood. Use a screwdriver to remove the screws on the vent cover. Gently pull the cover away from the wall. If it sticks, wiggle it slightly to loosen it.
Check for any obstructions behind the cover. Dust or grease might make removal difficult. Use a clean cloth to wipe away any dirt around the edges. Ensure that the area is clear for the new installation.
After removing the cover, inspect the vent duct for damage. Look for any loose connections or blockages. Fix these before proceeding to install the new backdraft damper.
Installing The Backdraft Damper
Start by placing the backdraft damper into the duct. Ensure it fits snugly. Use screws to secure the damper in place. Check that it opens and closes easily.
Next, apply sealant around the edges. This helps create an airtight seal. A good seal prevents unwanted air from entering. It also improves the efficiency of your range hood.
Make sure to test the damper after installation. Open and close it several times. Look for any gaps or leaks. Fix any issues to maintain proper airflow.

Credit: hauslane.com
Reattaching The Vent Cover
To reattach the vent cover, ensure it aligns with the duct. Check that the screws fit snugly. Use a level to confirm straightness. Tighten screws without overtightening.
For proper movement, test the damper by opening and closing it. It should move freely without any obstruction. Clear any debris that may block its path. This ensures the damper functions efficiently.
Testing The Range Hood And Damper
Testing the range hood and damper is crucial for proper ventilation. Start by performing a smoke test. Light a stick of incense or a small piece of paper. Hold it near the range hood while it is running.
Watch how the smoke behaves. It should be drawn towards the hood. If the smoke drifts away, the damper may be stuck or damaged.
For troubleshooting common issues, check the following:
- Damper Seals: Ensure they are not damaged or dirty.
- Airflow: Make sure there are no blockages in the duct.
- Fan Operation: Confirm the fan is running smoothly.
Maintenance Tips For Longevity
To keep your range hood backdraft damper working well, regular cleaning is essential. Clean the damper every few months. Use a soft cloth and mild soap for best results. Avoid using harsh chemicals that can damage the parts.
Look for grease or dirt buildup. This can block airflow and reduce efficiency. If the damper is hard to open or close, it may need a deeper clean.
Consider a replacement if the damper shows signs of wear. Rust or broken parts can affect performance. Always choose a replacement that matches your current model.
Check the warranty before replacing. Some parts may be covered. Regular maintenance extends the life of your damper and keeps your kitchen fresh.
Final Thoughts And Best Practices
Installing a range hood backdraft damper is simple. Follow these key steps for success:
- Choose the right damper size for your range hood.
- Turn off the power before starting any work.
- Attach the damper securely to the ductwork.
- Seal any gaps with duct tape for better efficiency.
- Test the damper to ensure it opens and closes properly.
Consider professional help for complex installations. DIY can save money, but it requires skill. Make sure to assess your comfort level. A professional will ensure everything is done safely.
Credit: www.familyhandyman.com
Frequently Asked Questions
How Do I Choose The Right Backdraft Damper?
Selecting the right backdraft damper involves considering the size and airflow requirements of your range hood. Ensure it fits your ductwork dimensions. Look for models made from durable materials to withstand heat and moisture. Also, check for energy efficiency ratings to improve your overall ventilation system.
Can I Install A Backdraft Damper Myself?
Yes, you can install a backdraft damper yourself if you have basic DIY skills. Start by turning off power to the range hood. Follow the manufacturer’s instructions carefully for mounting and sealing. Ensure that the damper opens and closes smoothly to prevent airflow issues in your kitchen.
What Are The Signs Of A Faulty Backdraft Damper?
Signs of a faulty backdraft damper include unusual noises, air leaks, or drafts when the hood is off. You might also notice increased cooking odors lingering in your kitchen. If the damper doesn’t open or close properly, it’s time for maintenance or replacement to maintain optimal airflow.
How Does A Backdraft Damper Work?
A backdraft damper works by preventing outside air from entering your home when the range hood is off. It contains flaps that open when the hood is in use, allowing air to flow out. When the hood is turned off, these flaps close to block any backdraft, ensuring energy efficiency.
Conclusion
Installing a range hood backdraft damper enhances your kitchen’s efficiency and air quality. Proper installation prevents unwanted air and odors from entering your home. By following the steps outlined in this guide, you can achieve a successful installation. Enjoy a fresher, cleaner kitchen with your new damper in place.
Happy cooking!